How To:
- Purchase Goods from Wishlists
- Create User Profile
- Creating Donee Page
- How to Create Wishlist
- Adding Items to Wishlist
- Add New Donee’s Administrator
- Edit Donee
- Edit/Delete Wishlists
- Thank your donors (create posts)
- How to Upload Pictures
Purchase Goods from Wishlists
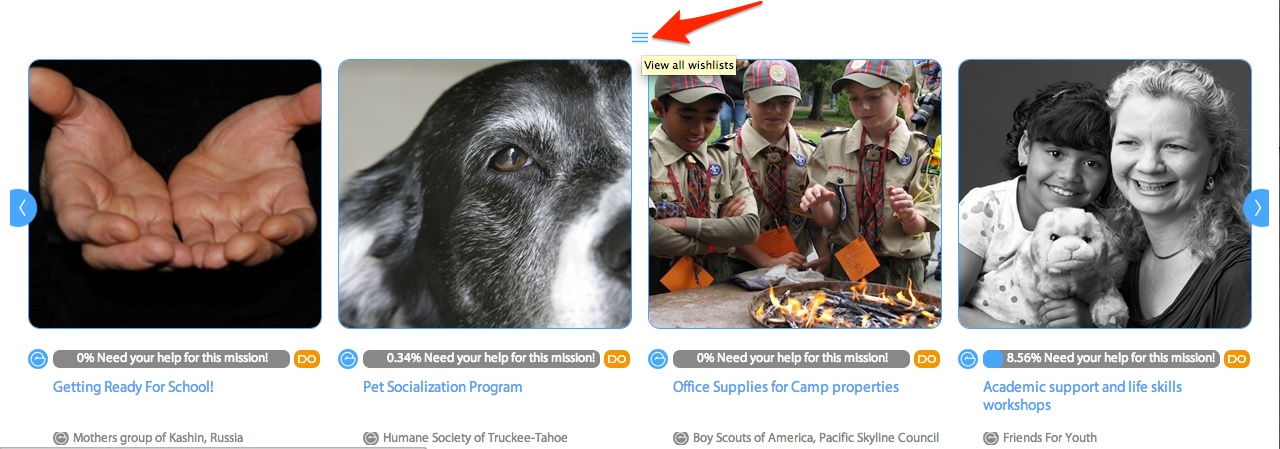
1. From main page select a wishlist that touches your heart. You can scroll through the lists using arrows on each side of the screen, or you can choose to see all wishlists by clicking on View all wishlists:
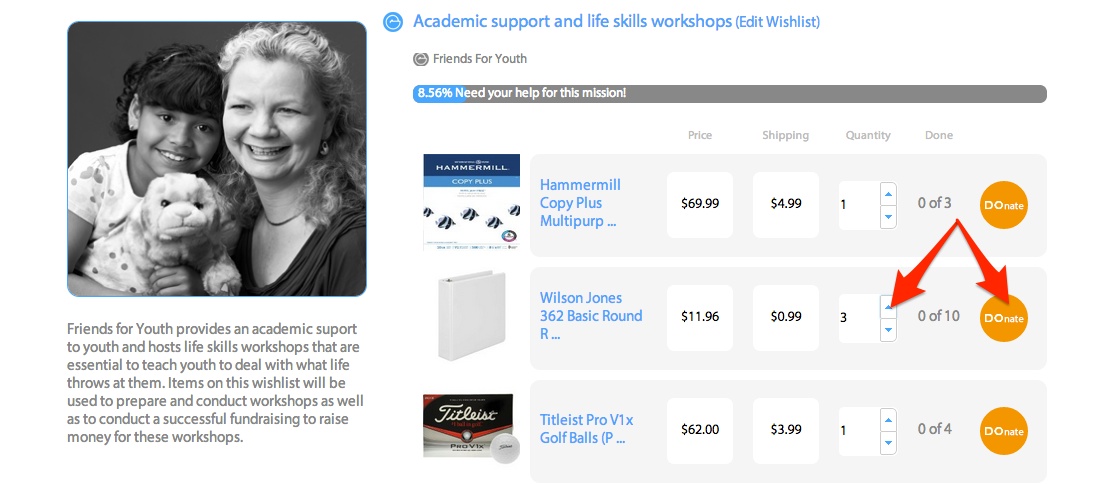
2. Choose items from the wishlist, adjust quantity, and click Donate. Selected items will be added to your cart.
3. When ready to pay, click on Checkout at the top of the page, enter your credit card information and click on Confirm and Pay.
Create User Profile
1. Click on Sign up button
2. Fill in required fields and click on Sign up
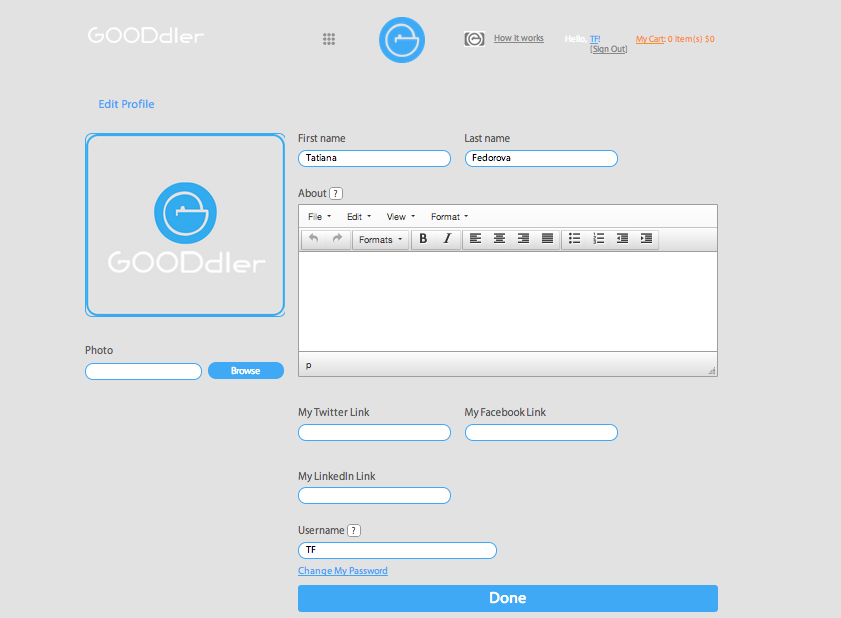
3. Once your profile is created, you will be able to edit it by adding your profile picture, writing about yourself, and posting links to your profiles on social media sites.
Tell Gooddler community about yourself. It will help you to connect with others who have similar interests.
Creating Donee Page
To create a page for your favorite charity or cause you have to have an account with Gooddler. If you don’t, you can sign up here: http://gooddler.com/SignUp
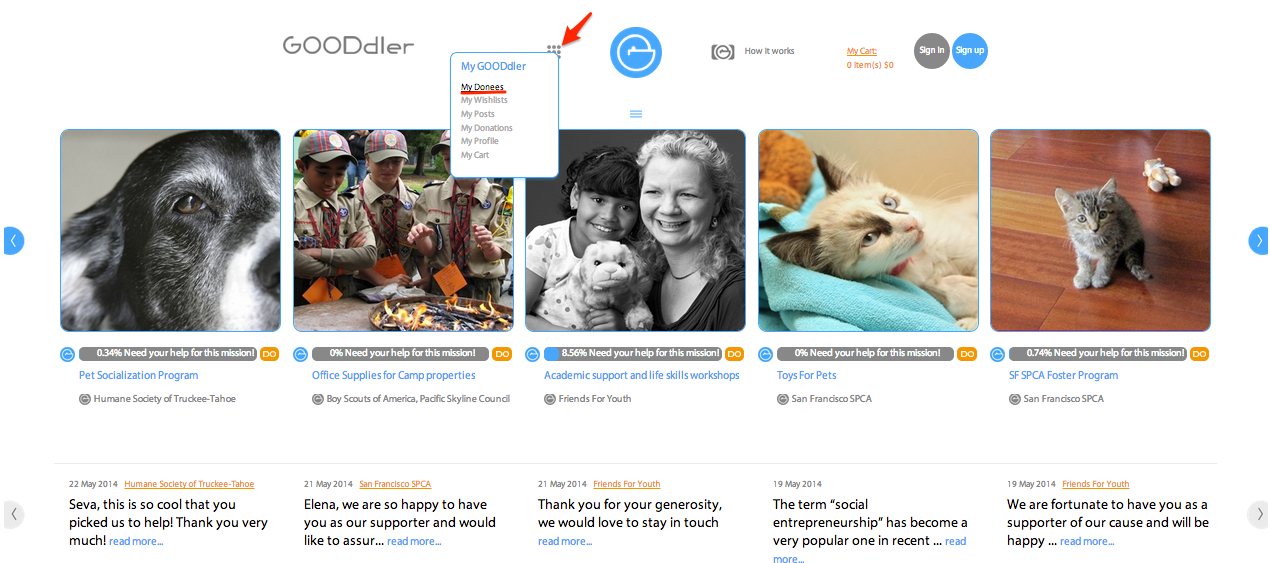
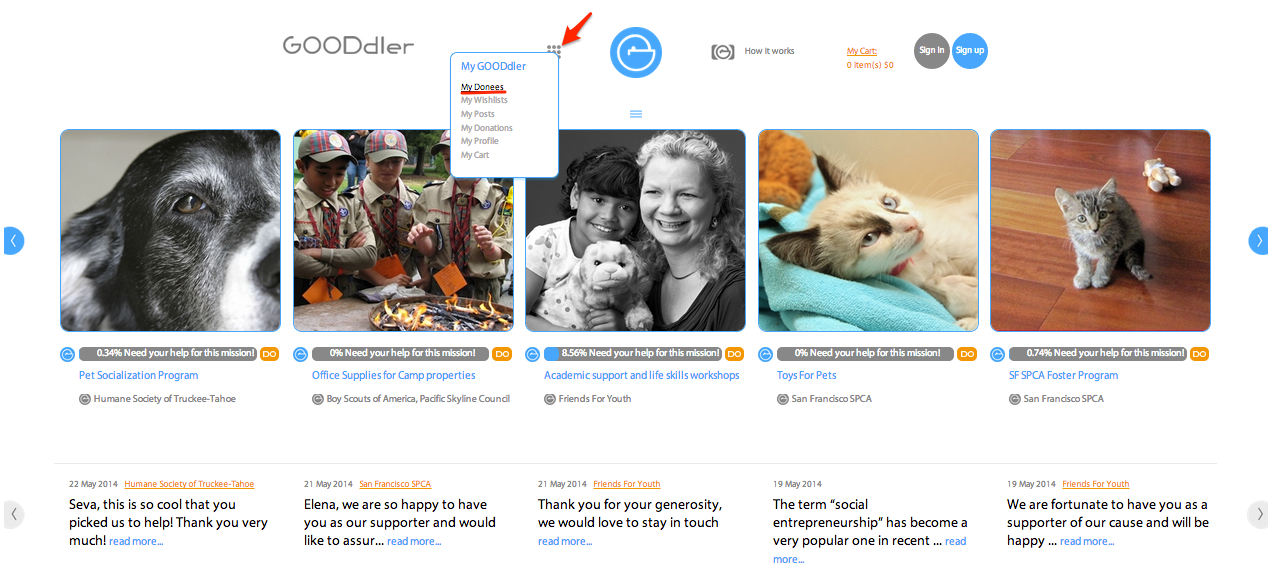
1. Log in into your account. Click on the App launcher icon and choose My Donees.
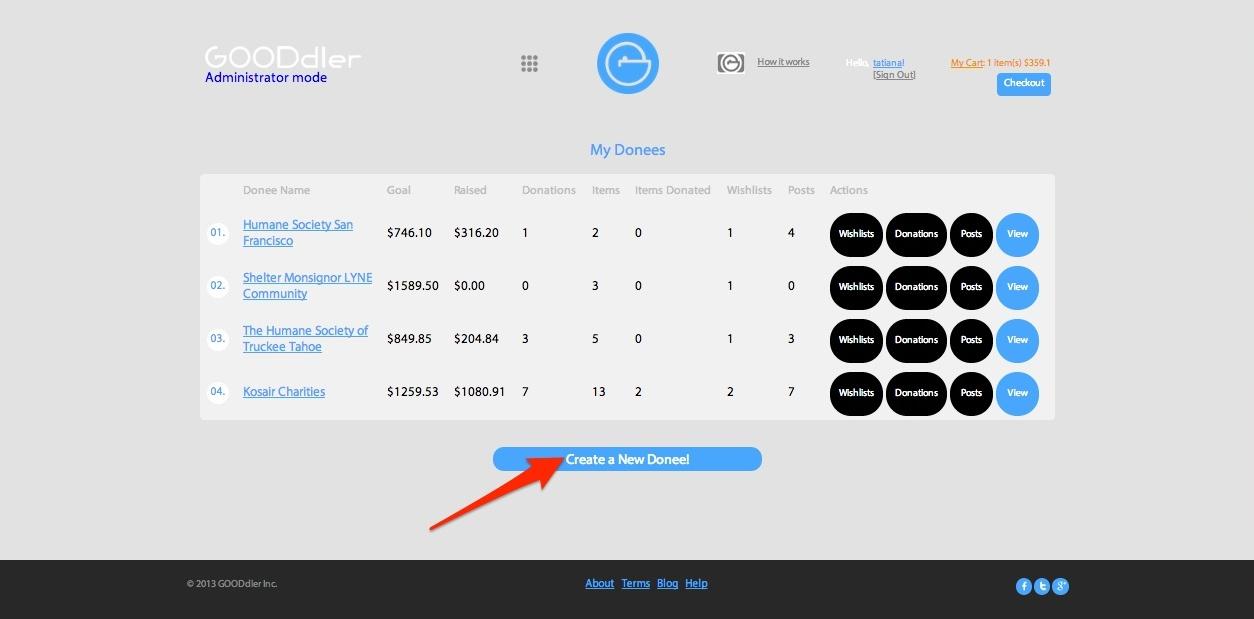
2. Click on Create a New Donee
3. Fill out all required fields. Note: all fields are required to proceed with creating a donee page
a) Create a subdomain of Gooddler.com
Creating a subdomain will help your organization to be found online. You will be able to share the link to your page with your supporters that will take you directly to your wishlists. For example, organization Friends for Youth, Inc (www.friendsforyouth.org) can create a subdomain http://friendsforyouth.gooddler.com
b) Enter Donee Name (an official name of the organization)
c) Enter Description
Tell us about your organization, what makes you unique, what needs you fulfil, whom you serve. Make your description compelling for Gooddler audience.
d) Add Shipping Address
Make sure you entered the address correctly. Check and double check to avoid items shipped to a wrong address.
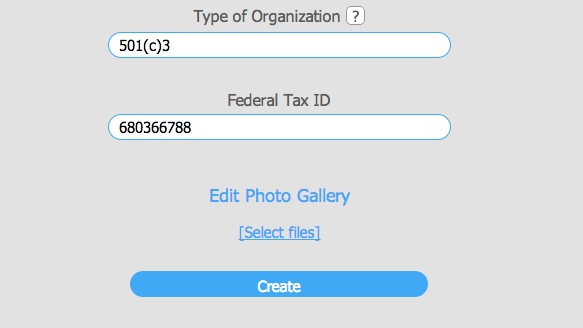
e) Enter your organization’s status (501(c)3, other form of non profit, ect.)
f) Enter Federal Tax ID
g) Edit Photo Gallery. You can add multiple pictures that tell stories about your organization. Visual images help a donor to make a decision to become a supporter of your organization. Don’t skip this step.
4. Click on Create to create a profile and save all entered information
Now as you created a page for your organization you are ready to Create a Wishlist.
How to Create Wishlist
1. Log in into your account. Click on the App launcher icon and choose My Donees.
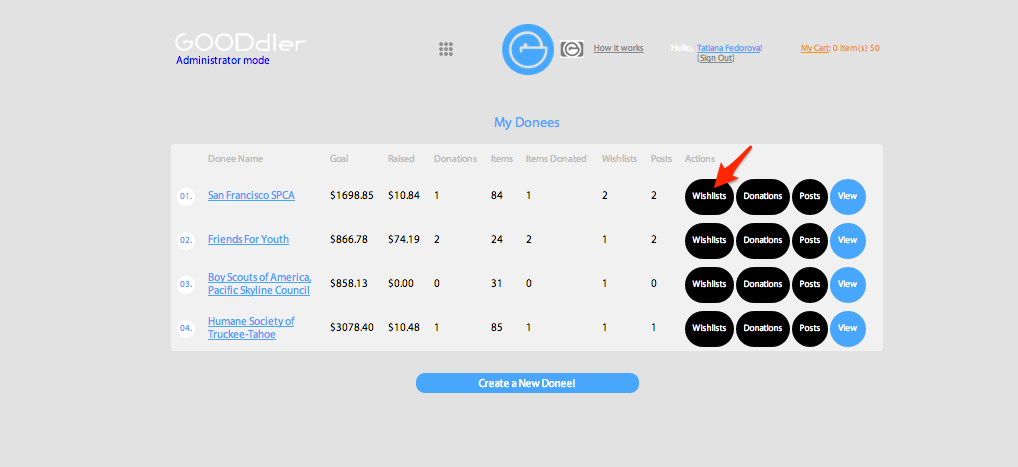
2. Click on Wishlists button
3. Click on Create a New Wishlist!
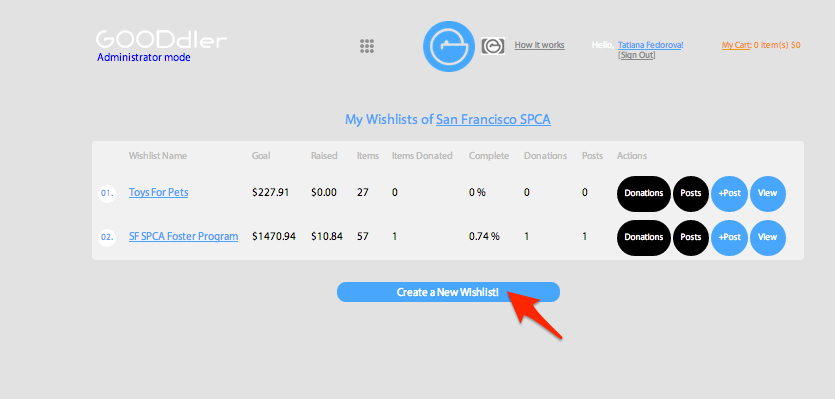
4. Fill out all of the fields
a) Enter Name of a Wishlist. Make it short but meaningful
b) Enter Description. What is the purpose of this Wishlist? What needs will it satisfy?
5. Check “Publish” box
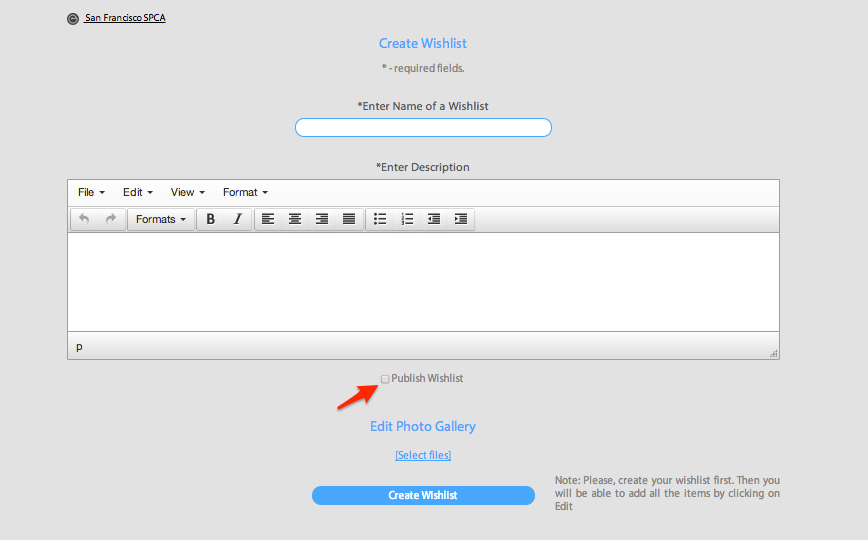
6. Edit photo gallery. Make pictures stand out. They will add value to the message.
7. Click on Create Wishlist
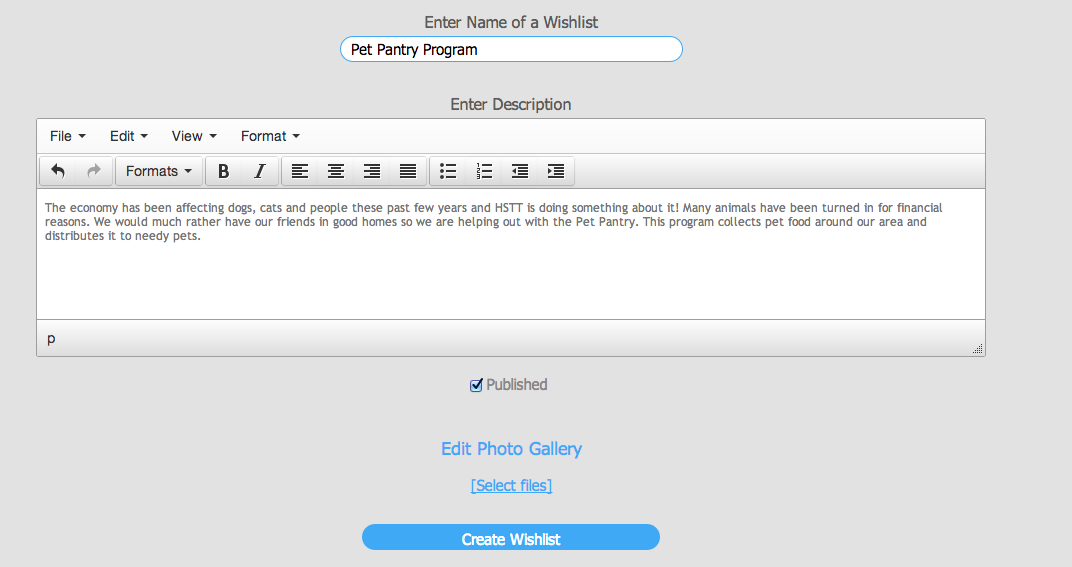
Note: You will have to create a wishlist first. To add items, go to Edit Wishlist
Adding Items to Wishlist
To be able to add items to a wishlist, you have to create it first. See “How to Create Wishlist” for instructions.
1. After you created a wishlist, click on “Edit this Wishist” to add items to it.
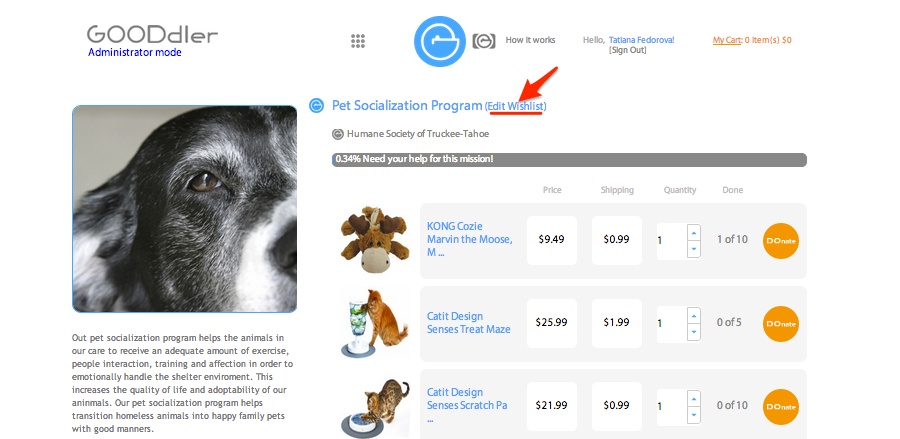
2. Find your desired item on Amazon. Copy the link and enter it into the “Amazon URL” slot right below Add Items, select desired quantity and click Add. Repeat it one item at the time.
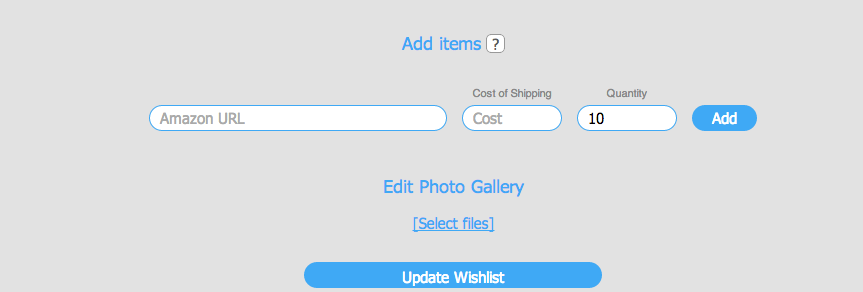
3. When all items are entered, click on Update Wishlist.
Add New Donee’s Administrator
1. Create Donee Page. See “Create Donee Page” for instructions.
2. Click on the App launcher icon and choose My Donees.
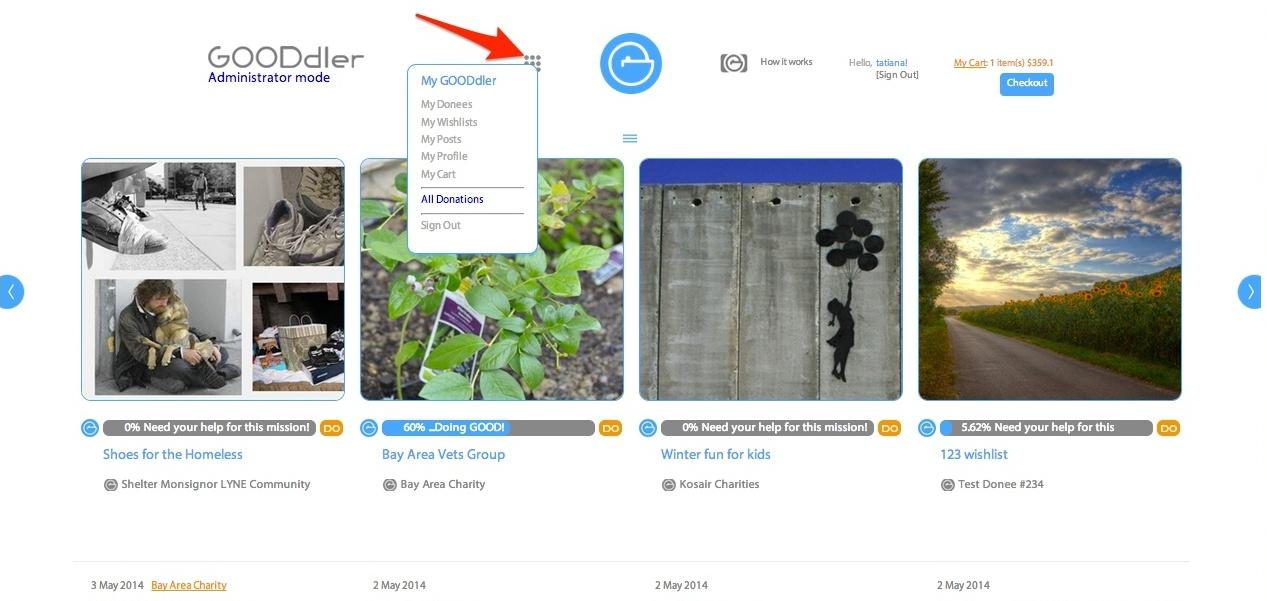
3. Click on donee to edit
4. Scroll to the bottom of the Edit Donee page to Access List section
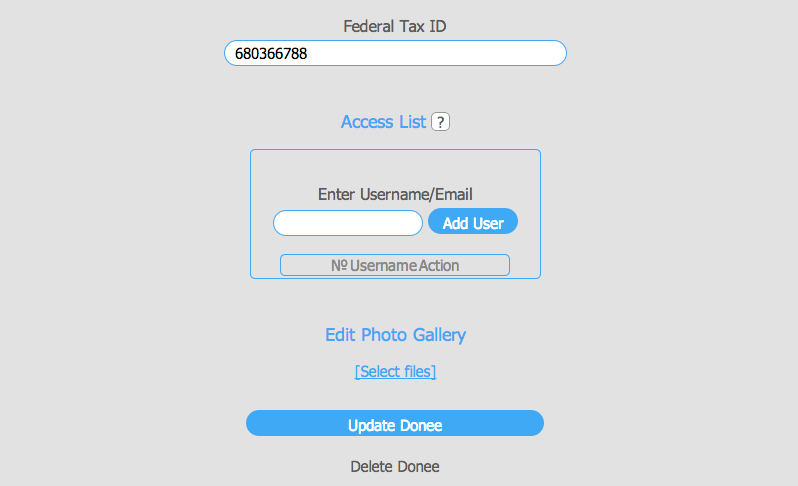
5. In the empty slot enter an email or a username of a person you would like to add as administrator of this Donee. This person will receive all rights to manage, support and edit a page of this Donee.
6. Click on Add User. The person that you added will receive a notification via email.
Edit Donee
1. Log in into your account. Click on the App launcher icon and choose My Donees.
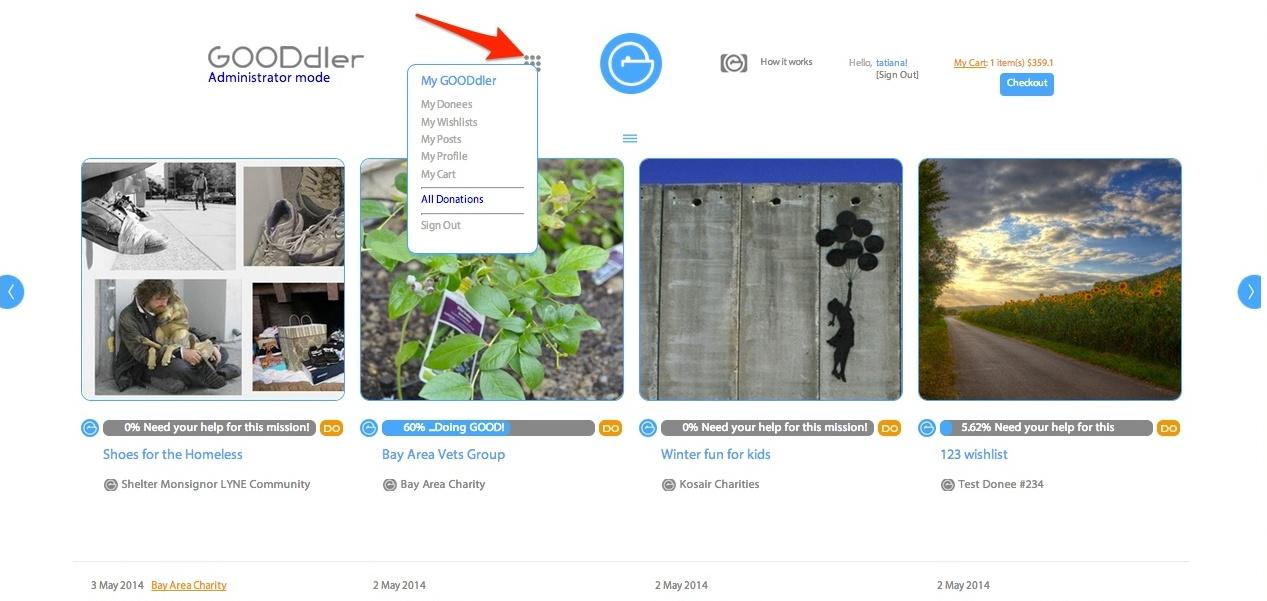
2. Select a Donee by clicking on the link. It will take you to Edit Donee page.
3. Make sure to Update Donee, once changes are made.
Edit/Delete Wishlists
1. Log in into your account. Click on the App launcher icon and choose My Wishlists.
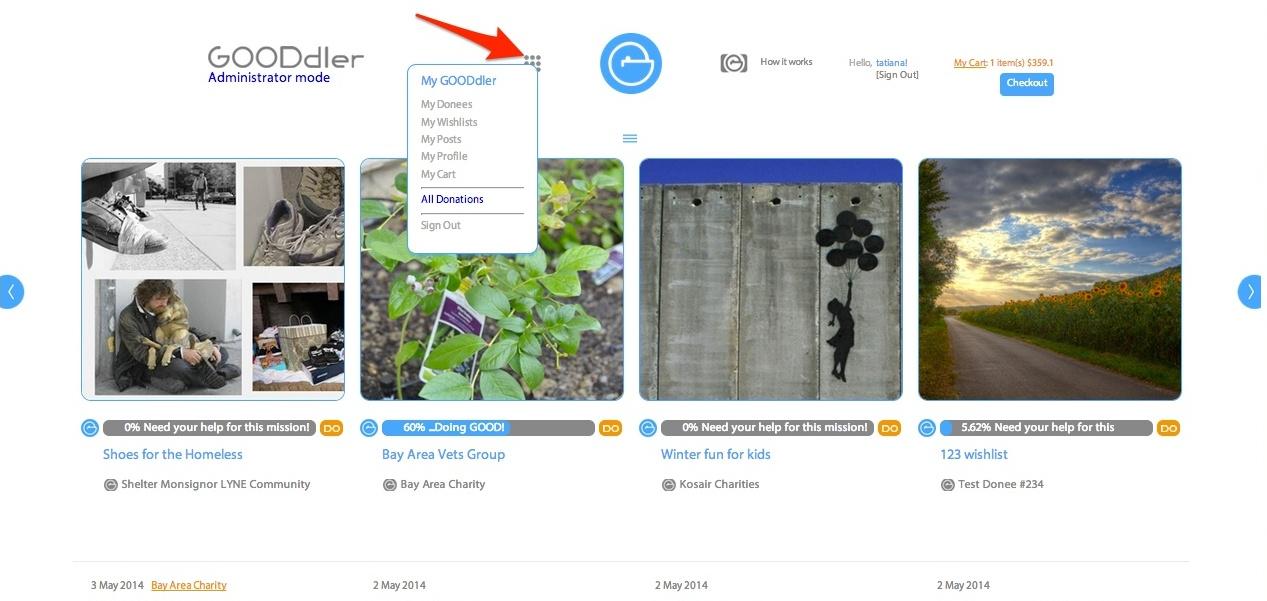
2. Choose a wishlist you want to edit, click on the link and you will be redirected to the Edit Wishlist page.
3. On this page you will be able to add/delete items, edit wishlist’s name and description, add/delete pictures, and delete this wishlist.
Thank your donors (create posts)
1. Log in into your account. Click on the App launcher icon and choose My Donees.
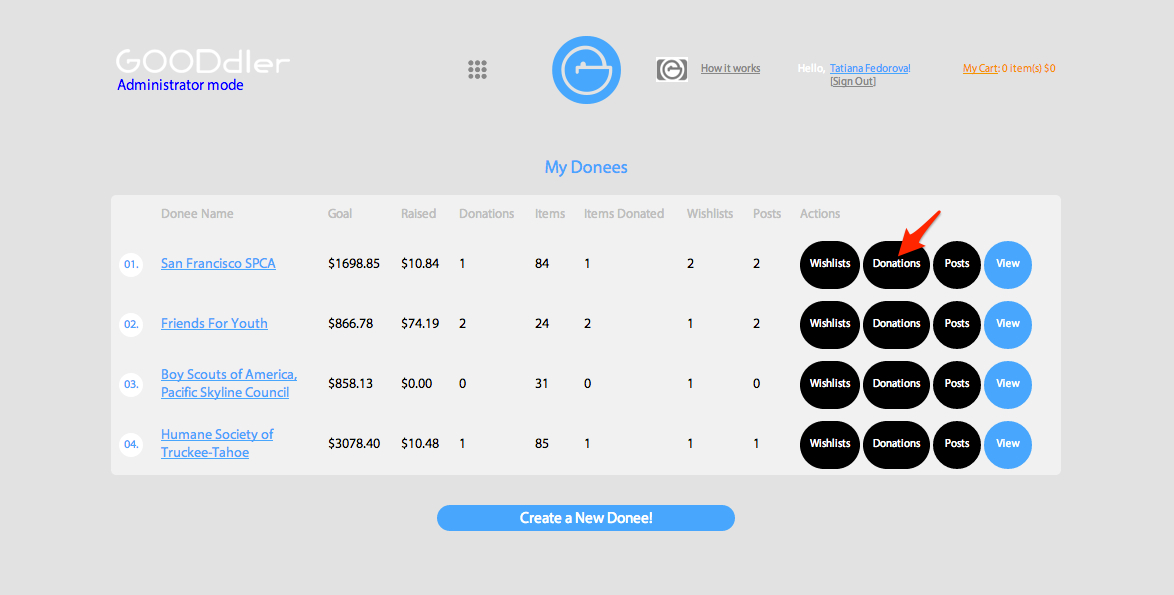
2. Click +Post button to add a new post about the Donor
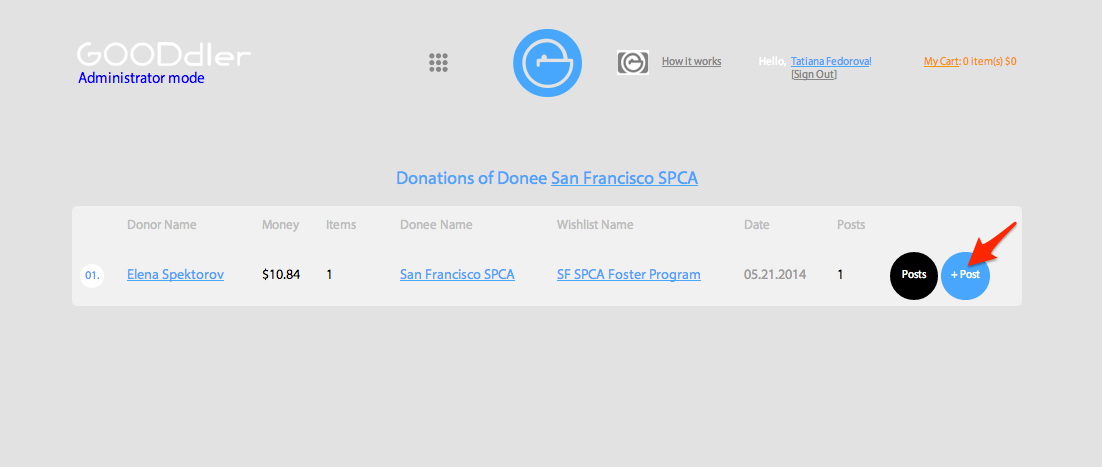
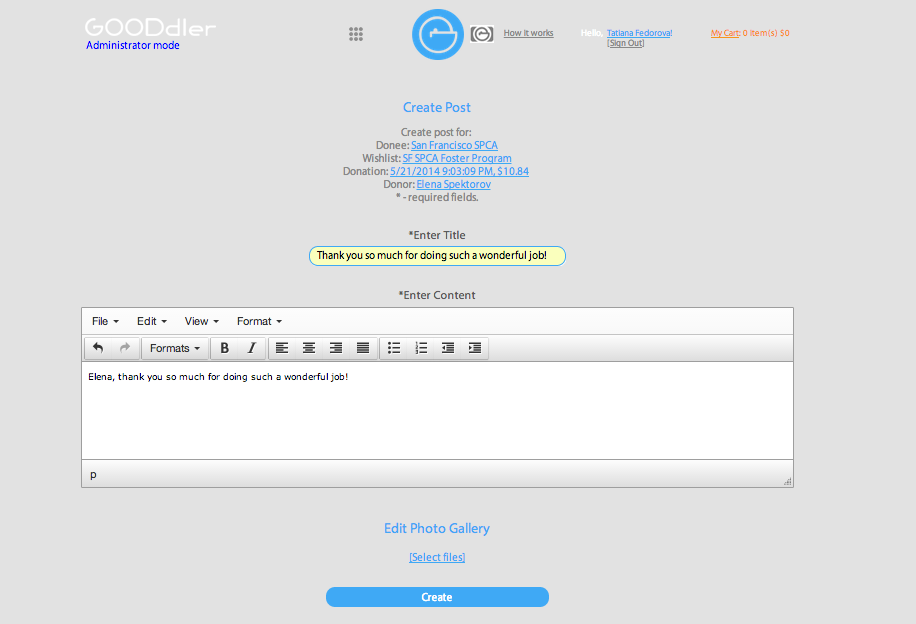
3. Create Post to Donor, add pictures and click on Create. Don’t worry, you will be able to edit your posts even after they are published.
How to Upload Pictures
When you are creating a new donee, editing a profile of an existing donee or creating a new post you have an option to upload a picture. At the bottom of Create Donee, Edit Donee or Create Post page click on "Select Files."Select a desired file from your computer. Pay attention to its size. A file can not be bigger than 1MB.